Categories
Home Improvement

LED Lights for Me, Thanks!

led-light-strips-for-homes
http://goo.gl/6T5MyM

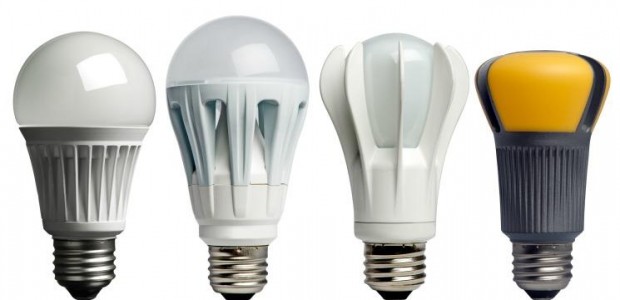
Standard light bulbs were good in there day but now it is time for them to be replaced with LED light bulbs. LED lights are eco-friendly and they provide the same amount of brightness if not more than their earlier counterparts.

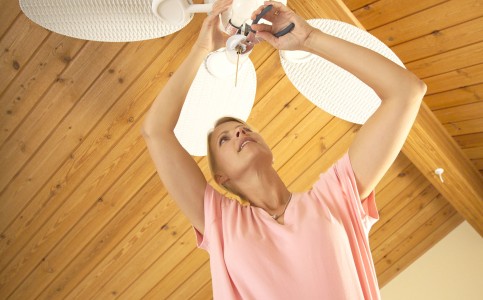
Switching all your lights to LED lights will save a great deal more energy, which means that you, as the homeowner, will be saving a lot on your light bill each month. Also, they will last you so much longer. This means you will not have to risk getting a nose bleed every few months after standing on a ladder replacing your light bulbs.

You will also find that conventional bulbs attract mosquitoes and bugs, especially during the summer time because they emit UV light. LEDs on the other hand do not do that so you won’t have to stink up the house or damage the ozone layer with harmful fumes from an insecticide spray can.

LED lights can be used just about anywhere in your home, both indoors and outdoors and have I mentioned just how energy saving these babies are? A conventional bulb will waste up to 60 watts per hour. In less than no time, their efficiency diminishes significantly, down to 20 percent even.  Then you have LED bulbs, which function at 80 percent efficiency and only waste 10 watts per hour. This certainly goes a long way to reducing the huge drain on humanity’s limited energy reserves.

If you are worried about cost, then you can relax. While the LED bulbs are more expensive, a lot of light companies are actually giving you some of your money back for switching to a more energy-reducing, greener light bulb alternative. Plus, you will be saving a load of money on your monthly bill which means you can spend more on outdoor adventures with your family and enjoy Earth’s natural light.

 There is another way that the LED bulbs are helping the environment out and as indirect as it might be, it still helps. With global warming and all, the spring and summer months are getting warmer and muggier. For those of you who can not afford centralized air conditioning or even an A/C unit, you will have to find other ways to keep your home cooler. In most cases, this means closing your windows and doors but without direct sunlight during the day, you will have to turn your lights on to see. This in itself will cause the temperature inside your home to rise because conventional bulbs warm up. LED bulbs do not. So how exactly does that help Mother Nature? It keeps you from going so insane from the already muggy situation and going out to buy an air conditioning unit, which will harm the environment.

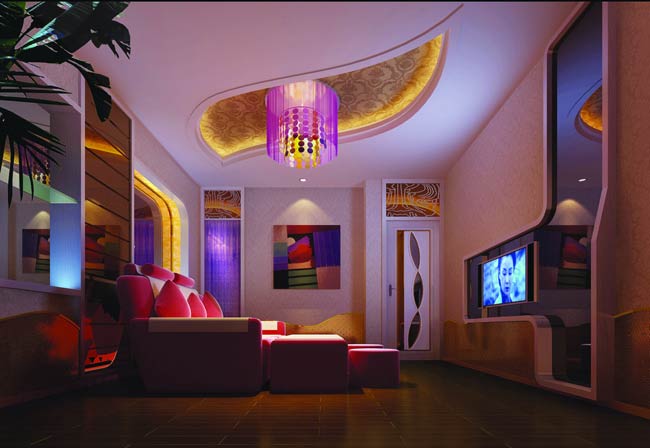
LED bulbs come with all kinds of perks that conventional ones do not. There are some that come in different colors, in case you want to create a mood in a certain room in your home (like the picture above). Others have dimmable qualities so you do not have to contend with a bulb that shines like the sun if you do not need it to like in hallways, restrooms, or living rooms. Some even come with a Wi-Fi feature that lets you turn the bulb on, off, or even control the level of dimness right from your desktop, laptop or smartphone.

If the reasons I mentioned are not enough to convince you then maybe this will. When you throw your old bulbs away, you are introducing mercury into the landfill and ultimately the soil. LED lights do not contain mercury but since you have to replace the conventional bulbs and discard them, you should take them to a recycling center as oppose to just throwing them away.

Categories
Articles Home Decor Home Design

Four Ways to Furnish Your Home Inexpensively

When it comes to having a home that you are truly comfortable living in, this will take a lot of effort on your part in terms of decorating it. However, this doesn’t mean that you have to break the bank to keep your home looking it’s best.

Here’s a quick look at four ways to inexpensively decorate and furnish your home.

Stack Shelves To the Ceiling

Even in the smallest of living spaces, you always have the option to maximize your square footage by going up. Think about it. If you take an entire wall in your home and line it with shelves that go all the way up to the ceiling, this can add anywhere from 100 square feet or more of storage space, and best of all, high-quality shelves are very affordable.

Freecycling

There are lots of people who have started taking part in freecycling. If you have a local freecycling organization, you should definitely join. In doing so, you can come across lots of free furniture pieces for your home, and in return, you can donate items you don’t want, which will then be available free of charge to other members in the group. It’s a win-win for everyone.

Maximize Air Space

Just the same as you should stack shelves up to the ceilings, you can also optimize the way you use your air space. From floating book shelves to hanging TVs, both of these ideas will go a long way in helping you decorate and furnish your home in an expensive yet stylish manner.

Old Wine Bottles

If you’re a drinker, then it’s time that you start recycling your wine and alcohol bottles. Some of these bottles make for the prettiest center pieces. A great way to get the sticky labels off the bottles is by letting them soak overnight in a small trash can full of one part ammonia and four parts water. The next morning, simply rinse off the bottles, and the sticky labels should come off very easily.


Categories
Articles Lawn & Garden Recycling

Turning Your Backyard Into a Green-Living Haven

No home is complete without a spruced up backyard. Even if this outdoor area is rather small, with the right touch, it can look better than ever before, and more importantly, it can be used as a versatile form of living space. From outdoor kitchens to in-ground swimming pools, there are many ways to make use of a backyard. And best of all, there are many green-friendly techniques you can follow to ensure you turn your backyard into a green-living haven.

Revamp Your Used Furniture

Your current outdoor patio furniture may seem a bit worn out, but by upcycling these pieces, you’ll be well on your way to revamping them into completely new pieces. From adding a fresh coat of paint to replacing the cushions, there are many affordable and eco-friendly methods for sprucing up old furniture and extending its longevity.

Be Cautious with the Way You Plant Flowers and Trees

If your backyard is spotted with plants, flowers and trees that require lots of water, you’ll at least want to group these together. In doing so, it will be easier to water these areas on a more consistent basis than you do other areas of the yard. Not only does this help conserve water, but it will do wonders for your water bill.

Do the Work Yourself

One of the best ways to create a backyard haven in a green-friendly way is by doing the work yourself. From raking the yard to digging holes to planting flowers, when you do things yourself, this allows you to accomplish your tasks in the greenest manners possible. And in addition to taking lots of pride in the end-product, you’ll also save a ton of money by doing the work yourself. Do keep in mind, though, that maintaining your backyard will take lots of work; it will need your attention all year long.

Categories
Articles Eco Eats Uncategorized

Go Italian for Meatless Monday with Stuffed Shells

Meatless Mondays, and other food-themed days of the week, were invented to help stave off the boredom of having the same dishes over and over again. Even within those parameters, though, you could find yourself falling into a rut when it comes to the meatless dishes that grace your table each Monday. Stuffed shells is a classic Italian dish that lends itself to a variety of different versions, making it easy for you to customize it to suit your palate.

Modern Twist on an Old Favorite Embraces Versatility

While you start this recipe the same way regardless of which version you make – by boiling water to cook the typical large shells that can easily be stuffed – there the similarities end. You can tweak the filling for the shells to suit your dietary restrictions. For example, you can use soy ricotta cheese if you are dairy free or an egg substitute if you are also a vegan, to make the filling for the shells.

It is All in The Sauce

The sauce that you use in this recipe is another avenue that allows for plenty of adaptation and customization. A good marinara sauce – store-bought or homemade from ingredients from your garden – provides a delicious and light taste that allows you to savor each of the individual flavors equally. Adding chopped vegetables – spinach, zucchini and carrots are just a few ideas – while the sauce is simmering increase the healthy quotient of this meal. Additions, such as tofu or textured vegetable protein (TVP), add a significant dollop of protein.

Basic Stuffed Shells Recipe

12 large pasta shells

1 teaspoon extra-virgin olive oil

2 teaspoons minced garlic or 2 cloves of fresh garlic

1-1/4 cups finely chopped onion

1-1/2 cups ricotta cheese or substitute

3 tablespoons Parmesan cheese

Seasonings to taste (black pepper, Italian seasoning, etc.)

1 egg, lightly beaten

1-1/2 cups of sauce

1 cup mozzarella cheese

1. Generously grease a 9 inch baking dish and set aside. Preheat oven to 350 degrees.

2. Stirring often, cook pasta shells according to the directions on the package just until tender. Drain, rinse under cold water and set aside.

3. Heat oil in large skillet and add the onion and garlic, cooking until translucent.

4. Mix ricotta, egg and parmesan cheese, seasoning it to taste. Add cooked onion and garlic before mixing well.

5. Using about two tablespoons, generously stuff each cooked shell before arranging them in the dish.

6. Top with sauce and sprinkle with mozzarella cheese. Bake for 30 minutes. Makes about 4 servings.


Categories
Articles Eco Eats Eco Tips Uncategorized

Ways to Preserve Summer’s Bounty

It might be hard to believe, but the end of the growing this summer’s growing season is right around the corner. Many of the fruits and vegetables are reaching their peak and must be picked now before they begin to wither on their vines or stalks. In order to enjoy the benefits of summer’s bounty, there are a few tricks and tips to implement now.

Freeze

One of the best ways to extend your enjoyment of summertime foods is to freeze them. Quick and easy, freezing foods at the peak of their freshness helps retain their vibrant colors and superior nutritional value. To freeze berries, gently wash them in cool water before patting them dry and lay them on wax paper-lined cookie sheets in a single layer. After they are frozen, place in a freezer safe container or bag, making sure to remove all the air first, before closing it securely. This method works for all berries except for blueberries. Washing them before freezing makes their skins tough so avoid doing so. Just be sure to do so before using them later.

Zucchini and other vegetables can be shredded so they can easily be added to baked goods and savory sauces before being placed in freezer safe bags. Be sure to label storage containers and bags with the type of food and the date.

Canning

Canning allows you to turn the berries, cucumbers and peppers you pick this summer into delicious, fresh-tasting condiments that can be enjoyed by your whole family, even when the season is over. Today, there is an array of different methods you can use to can different foods. Whether you want to go the traditional route and can foods using a pressure cooker or you want to try one of the newer no-cook methods, be sure to follow the directions carefully in order to ensure optimal results.

Be sure to have fun experimenting with the best ways to preserve summertime crops. Taking the time to do this now will ensure that you can enjoy the taste of fresh foods, even in the dead of winter.

Categories
Articles Lawn & Garden Uncategorized

Getting Your Yard to Look Marvelous In a Budget-Friendly Manner

A large number of homeowners take a great deal of pride in their lawns. If you happen to be one of these people, there’s no need to stress about taking care of your lawn even if you’re on a budget. Let’s take a quick look at a few budget-friendly tips you can follow to keep your lawn looking its best all year long.

Swap out your services

If you have time to mow your own lawn, then by all means you should. If, however, time doesn’t permit, then you’ll need to hire someone to mow it for you. Unfortunately, paying for lawn mowing services can get quite expensive. Think about it, if you hire someone to mow your lawn for $50 a week, that’s still $200 a month, sometimes $250.

To avoid having to pay for lawn care, you could swap out your services. For example, if your lawn care guy has kids, you could offer to babysit one to two days/nights a week in exchange for mowing your lawn. It’s a win-win for everyone.

Make sure your lawn is mowed in the right manner

When mowing your lawn, it’s best to leave the mower blades high. In doing this, the grass will grow deeper roots, which means your grass will not only be thicker but healthier too.

Quit wasting time picking up any clippings

After your lawn gets mowed, it may be tempting to pick up any loose clippings. In all actuality, though, it’s best to leave them sitting as they are because they will eventually start to breakdown, which means they’ll be contributing nitrogen to your lawn and serve as a free form of grass fertilizer.

Plant your own flowers

Instead of paying a landscape specialist thousands of dollars to plant shrubs, trees and flowers, consider doing the work yourself. There are many free, online tutorials that you can use to walk you through all involved planting steps, and best of all, you’ll be able to take much pride in your yard once the work is done.

Water your lawn in the morning

According to Keypointapp, it’s best to water your lawn in the morning. The grass will soak up the water, and any excess water will evaporate before the day ends, meaning it’ll be less likely that fungus will form on your lawn.

Categories
Articles Eco Tips Home Improvement Uncategorized

Tips for Adding Beauty and Value to Your Home the Eco-Friendly Way

When people go about remodeling or adding onto their homes, they often think the involved processes will be overly expensive. Don’t be fooled by this false belief. There are many affordable ways that you can give your home a makeover, and best of all, you can be eco-friendly at the same time. Here are some great tips for adding both beauty and value to your home, while at the same time being mother nature’s best friend.

Replacing Your Roof

Yes, replacing your roof can be a bit costly at first, but if you cover it in shingles or metal that are light in color, this can greatly reduce the temperature in your attic. As a result, you’ll likely reap the benefit of cooler temperatures in your home, which means you can save a considerable amount of money on your cooling expenses.

Decorating with Pallet Racks

Pallet racks are often given away for free from both large and small businesses. By gathering several of them, you can easily recycle them by constructing shelves, indoor and outdoor furniture and lots more. You can paint or stain these racks any color of your choosing, which is an excellent way to add lots of character to your home.

Swap Out Your Showerheads

Being friendly to mother nature involves reducing your water usage. A great way to do this is by switching out the showerheads in your bathrooms to ones that support the low flow of water.

Install Extra Ceiling Fans

Fans can go a long way in adding flair to any room, and better yet, they make it easier to cool your home during the warmer months of the year. Mother nature will truly appreciate it when you turn off the AC and crank up the fans.

Insulate Your Water Heater

There’s a good chance that your hot water heater is already insulated, but if you add extra insulation, this will make it easier to heat your water, and it could save you up to 15 percent or more on the expense of heating your water.

Tint Your Windows

Just the same as you can tint the windows on your car, your home’s windows can be tinted too. In doing this, you’ll be reflecting the sun’s glare, which will make it easier to cool your home.

The Takeaway

Giving your home an eco-friendly makeover doesn’t mean you have to empty your bank account. And even though you’ll be spending money to carry out the projects, you can rest assured that you’ll be saving money at the same time on several of your utility bills.

Categories
Eco Tips Lawn & Garden Uncategorized

Low-maintenance, low-water: Herb and flower spiral garden

It is a challenge for gardeners in hot climates to maintain a working food or flower garden without using a ton of water. With water shortages prevalent throughout the south, it is important to consider planning your garden with water conservation in mind. Not only will it help the environment, it will preserve the health of your soil and vitality of your crop.

A common problem with over-head watering is the salt that builds up in the dirt from evaporation. When garden water evaporates, it leaves salts and other trace minerals behind which eventually can have negative consequences for the soil, which was one of the main problems during the great depression and the famous dust bowl .

There are a number of steps you can take to assure that minimal water will be wasted, while getting a maximum yield from your crop whether that is flowers or food.

A great way to conserve water is through the manipulation of the garden plot. To build a low water herb spiral, you’ll want to dig a bowl-shaped hole in the desired location. Pick an area of yard with adequate sunshine for a good portion of the day.

  • Dig the circle down about a foot deep and about three feet in diameter. You’ll want to have enough room for all of the herbs or flowers you plan to sow, making sure to leave at least 6 inches between each plant, also accounting for the width of that plant.
  • Layer about 4″ of gravel on the bottom, building a rock spiral off of that foundation. Fill the remaining structure with good quality potting soil. The gravel will hold the water at the bottom, keeping the soil at a regular moisture level without over-saturating.

This and other techniques can be utilized to conserve water without a bunch of consistent hassle. Just dig the spiral, lay the gravel, do some initial watering sufficient for transplanting, and watch it grow. This low maintenance herb spiral will last a long time, and collect rain water without any help from you. Happy gardening!

Categories
Eco Tips Lawn & Garden Uncategorized

Building and Decorating Your Patio In an Eco-Friendly Way

There’s something about the outdoors that makes people want to live a greener life. And this especially rings true for outdoor patio areas. Fortunately, there are many ways to build and transform patios into some of nature’s best friends.

Choose your construction materials wisely

It’s of the utmost importance to construct your patio areas using sustainable building materials. Some of the more eco-friendly materials to choose from include:

  • Reclaimed brick
  • Recycled stone pavers
  • Natural stone
  • Locally produced bricks
  • Responsibly harvested wood

Choose your builder wisely

Just the same as you need to carefully choose your building materials, you’ll also need to thoughtfully pick a builder. It is highly recommended by the Sierra Club that you choose a builder who is LEED certified by the US Green Building Council. When you hire this type of contractor, you can rest assured that he or she will have the advanced knowledge that it takes to build your patio according to eco-friendly practices.

Decorate and accessorize

Decorating your outdoor patio area in an eco-friendly manner isn’t as difficult as you think. Take for example removal wallpaper murals. These types of paintings don’t require paste or glue, making them extremely auspicious to mother nature.

When it comes to outdoor furniture for your patio, once again you’ll want to choose pieces that are manufactured using sustainable materials, such as bamboo. You should also strive to add liveliness to your outdoor area for nighttime entertainment by using solar-powered accent lighting fixtures.

Lanscaping around your patio area

You’ll need to give a lot of thought into the landscaping that you place around your patio. You’ll of course want this area to promote serenity and joy, all the while using plants, shrubs and trees that are native to area.

What’s the importance of native plants? For starters, these plants will be grown locally in your area, meaning they’ll be much more likely to survive in your backyard. Also, since they are native to your area, they will require less water to stay alive, which can do wonders for your water bill.

If you’re unsure as to the plants that are native to your community, a local agricultural extension can provide you with lots of valuable information.

The Takeaway

Building and decorating your outdoor areas doesn’t have to cost an arm and a leg. And best of all, with a bit of effort, you can construct and accessorize your outdoor areas, including your patio, by being environmentally friendly.

Categories
Eco Eats Eco Tips Uncategorized

Preserving Blackberries

The middle of summer means that blackberries are beginning to ripen. Whether you pick them yourself in the fields or buy them at a farmer’s market, blackberries have a sweet, tangy flavor that is reminiscent of the hot days, cool breezes, and long afternoons of summertime. Preserving blackberries for winter can give you a taste of summer during chilly January days.

Of course, when you preserve blackberries, you can make them into jam or can them in a sugar syrup. However, the simplest way to put back berries for the long, cold winter months is to freeze them. You do not need a large deep-freezer to do this unless you plan on freezing many gallons of berries. Most of the time, your ordinary kitchen refrigerator-freezer will be sufficient.

Needed Supplies

Before you start, you should gather your supplies. You will need zip-top freezer bags in quart or gallon size. You will also need a colander, a clean kitchen towel, a clean cookie sheet, and a spatula.

Cleaning Blackberries

First, spread the berries on the cookie sheet. Examine them closely, and discard any berries that are bruised, soft, or squashed. Pick out any bits of foreign matter that you may find, like berry caps or pieces of grass.

Next, place the berries in the colander and put the colander in the kitchen sink. With the spray attachment at your sink, rinse the berries fully with cool water. You may want to shake the colander to rearrange the berries and make sure that they are all clean. Shake the colander to help the berries drain.

Spread your kitchen towel on the counter and pour the blackberries from the colander onto the towel. This will help blot up any excess water on the berries. You may want to gather up the ends of the towel in your hands and roll the berries around to get them drier.

Freezing and Storing Blackberries

Next, spread the berries in a single layer on your cookie sheet. Place the pan on an empty shelf of your freezer. Freeze the blackberries for five or six hours or overnight. The next morning, you can use a spatula to scrape the berries into the freezer bags. Seal the bags, removing as much air as you can.

Store the berries in the bags for up to six months in your freezer. You can thaw frozen blackberries by warming them in the microwave for 30-60 seconds. They are excellent in smoothies, cobblers, and baked goods or as toppings for waffles and pancakes.